
Moving a WordPress site sounds simple: copy the files, copy the database, point the domain at the new server. In practice, migrations are where I see some of the most stressful website incidents. Images go missing, the admin redirects back to the old domain, widgets disappear, contact forms stop sending, or an online store takes orders on the old server for a day without anyone noticing.
The good news is that almost every one of those problems is predictable, and therefore preventable. In this guide I walk through the process I use when moving WordPress and WooCommerce sites between hosts, from a local environment to live, or from one domain to another. It works whether you use WP-CLI on the command line (my preference) or a migration plugin, because the principles are the same.
In this article
The migration at a glance
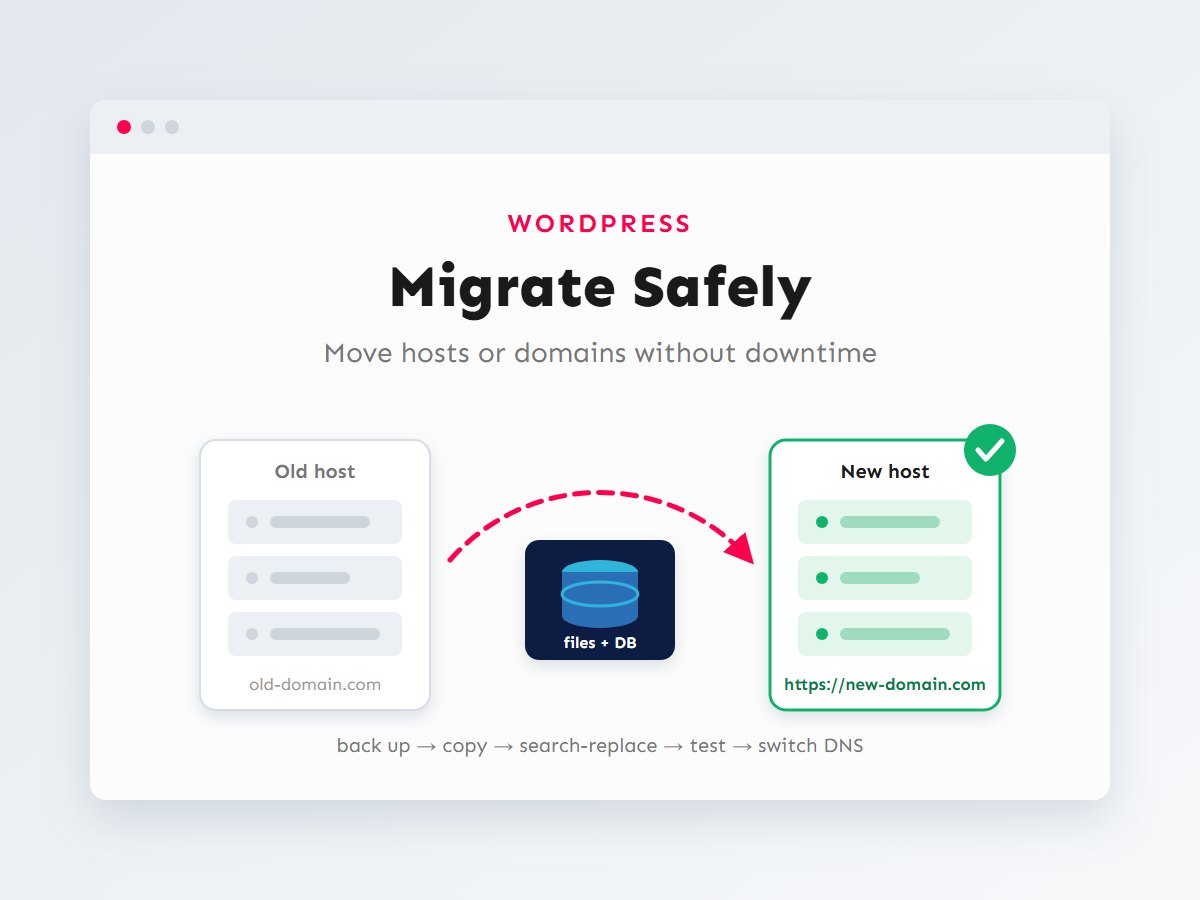
A WordPress site is two things: files (WordPress core, themes, plugins and uploads) and a MySQL database (posts, pages, settings, users, orders). A migration moves both, then updates every reference to the old address, then switches visitors over. The order of these steps matters, and so does testing in between.
The most important idea in that diagram: visitors keep using the old site until the new one is fully tested. You never “work on the live migration”. You build a complete, verified copy, and only then flip the switch.
Before you start: inventory and backups
Ten minutes of preparation saves hours of guessing later. Before touching anything, write down:
- PHP and MySQL versions on both servers. Moving from PHP 7.4 to PHP 8.3 is a migration and an upgrade; test for both.
- Where email is handled. If the domain’s email (MX records) lives with the old host, changing DNS carelessly can break your inbox, not just the website.
- Anything outside WordPress: cron jobs, custom
.htaccessor Nginx rules, files in the web root that aren’t part of WordPress, server-level redirects. - Licensed plugins that are tied to a domain and may need re-activating.
- The current DNS records, copied in full (A, CNAME, MX, TXT). A screenshot of the DNS zone is a cheap insurance policy.
Then take a complete backup of the old site, files and database, and download it somewhere that is neither the old server nor the new one. This backup is your rollback plan. If everything else goes wrong, you can always return to exactly where you started.
Moving the files and the database
If you have SSH access, WP-CLI makes the database part fast and reliable. On the old server, export the database and package the files:
# On the old server, from the WordPress root
wp db export backup.sql --add-drop-table

# Package everything (core, wp-content, wp-config.php, .htaccess)
tar -czf site-files.tar.gz .
Copy both files to the new server (with scp, rsync or your host’s file manager), then unpack the files and import the database:
# On the new server, inside the new web root
tar -xzf site-files.tar.gz

# Point wp-config.php at the NEW database first
wp config set DB_NAME     new_db_name
wp config set DB_USER     new_db_user
wp config set DB_PASSWORD 'new-strong-password'
wp config set DB_HOST     localhost

# Import the old data into the new database
wp db import backup.sql
Check the table prefix in wp-config.php ($table_prefix) matches the tables you just imported. A mismatch is the classic cause of the “WordPress wants to install itself again” screen after a migration.
No SSH access?
On shared hosting without SSH, a reputable migration plugin does the same job: it exports files and database into an archive and handles URL replacement on import. The rest of this guide still applies. Back up first, test before DNS, and keep the old site running until you’re sure.
Replacing URLs without breaking serialized data
WordPress stores full URLs in the database: in post content, in image references, and in settings. If the domain changes (or you move from http to https), every one of those references must be updated. This is the step that breaks the most migrations, because of how WordPress stores settings.
Many options, widgets, theme settings and plugin configurations are saved as serialized PHP data. Serialized strings record their own length. If you change the text but not the recorded length, PHP can no longer read the value, and WordPress quietly treats it as empty.
That’s why you should never run a raw SQL REPLACE() across WordPress tables, or open the SQL file in a text editor and use find-and-replace. Use a tool that understands serialization. WP-CLI’s search-replace command unserializes each value, replaces the text, and serializes it again with the correct lengths. Always do a dry run first:
# 1. Preview: how many replacements, in which tables?
wp search-replace 'https://old-domain.com' 'https://new-domain.com' --dry-run --report-changed-only

# 2. Run it for real (--all-tables also covers tables with a custom prefix)
wp search-replace 'https://old-domain.com' 'https://new-domain.com' --all-tables --precise

# 3. Moving from http to https on the same domain?
wp search-replace 'http://example.com' 'https://example.com' --all-tables

# 4. Clear caches so nothing serves the old values
wp cache flush
wp rewrite flush
A few details I always double-check:
- Replace the full URL, including the protocol. Replacing just
old-domaincan hit email addresses and unrelated text. - Don’t replace the GUID column on a site that is already live and has RSS subscribers. WP-CLI skips
guidby default, which is the right behaviour. - Check the site URL options afterwards with
wp option get siteurlandwp option get home. - Page builders such as Elementor keep their own CSS files. Regenerate them after the replacement (Elementor has a “Regenerate CSS & Data” tool for this).
Testing before anyone sees it
You can preview the new server with the real domain before changing DNS. Add a line to your computer’s hosts file that points the domain to the new server’s IP address. Your browser then loads the new server while everyone else still sees the old one.
# Windows: C:\Windows\System32\drivers\etc\hosts
# macOS / Linux: /etc/hosts
203.0.113.25   example.com www.example.com
(Use your new server’s real IP; the address above is a documentation example.) Then go through the site as a visitor and as an editor: the homepage, a few posts, images, forms, search, the login, the admin, and anything that’s specific to the business. Remove the hosts entry when you’re done, or you’ll keep seeing the new server and wonder why nobody else does.
Switching DNS with minimal downtime
When you change where your domain points, the change isn’t instant everywhere. DNS resolvers around the world cache your records for as long as the TTL (time to live) says. If your TTL is 24 hours, some visitors may keep reaching the old server for up to a day.
The fix is to lower the TTL in advance. A day or two before the move, set the TTL of the records you’ll change to something short, such as 300 seconds. Wait until the old, long TTL has expired. Then, when you switch, the change reaches almost everyone within minutes.
Change only the records you need to, usually the A record for the root domain and the www record. Leave MX and email-related TXT records alone unless email is moving too. If you also move the domain to new nameservers, that’s a separate, slower change; I avoid doing both on the same day.
Once the domain points to the new server, issue the SSL certificate there (most hosts do this automatically with Let’s Encrypt once DNS resolves) and confirm the site loads over https without warnings.
Extra care for WooCommerce stores
A blog can tolerate a few hours where comments land on the old server. A store can’t, because every order placed on the old server after you copied the database will be missing from the new one. For stores, I add three steps:
- Pick a quiet time for the final sync, based on the store’s own order history.
- Freeze changes on the old site during the final copy: put it in maintenance mode, or pause checkout, so no new orders arrive between the last database export and the DNS switch.
- Re-sync the database last. Do the full migration and testing in advance, then repeat only the database export, import and search-replace right before switching DNS. With WP-CLI, that final sync takes minutes.
Also check payment gateway webhooks (they usually point to your domain, which is fine, but some gateways restrict by IP), scheduled actions under WooCommerce → Status → Scheduled Actions, and transactional emails. Place a real test order and refund it. If you’ve built custom checkout behaviour, as described in my WooCommerce customization guide, test those paths specifically.
Launch checklist and rollback plan
This is the checklist I go through on every migration. It’s deliberately boring. Boring migrations are the goal.
| When | Check |
|---|---|
| Before | Full backup downloaded off-server · PHP/MySQL versions noted · DNS zone saved · TTL lowered 24–48 h ahead · email (MX) location confirmed |
| After import | siteurl and home correct · search-replace done (dry run first) · table prefix matches · permalinks flushed · caches cleared |
| Hosts-file test | Pages, images and menus load · login and admin work · forms send · search works · no mixed-content warnings |
| After DNS | SSL valid · contact form emails arrive · test order and refund (stores) · cron and scheduled actions run · error log clean |
| A few days later | TTL raised again · Search Console shows no new errors · backups configured on the new host · old server retired |
And the rollback plan, which you hopefully never use: because the old server is still running and untouched, rolling back means pointing DNS back to the old IP. With a short TTL, that takes minutes. This is exactly why you lower the TTL first and why you don’t cancel the old hosting on migration day.
A migration is also a good moment to improve things: update PHP, remove plugins you no longer use, and check performance on the new host. My Core Web Vitals checklist and security hardening checklist are good companions for the week after launch.
Key takeaways
- Back up everything first and keep the old site running until the new one is proven.
- Never use a raw SQL find-and-replace on WordPress data. Use
wp search-replace, with a dry run first. - Test with a hosts-file preview before changing DNS.
- Lower the DNS TTL a day or two ahead so the switch (and any rollback) takes minutes.
- For stores, freeze orders during the final database sync and place a real test order afterwards.
Planning a move to a new host, a new domain or HTTPS, and want it done without surprises? I handle WordPress and WooCommerce migrations end to end, including the testing. Tell me about your site and where it needs to go.